



Building courses in Auto-Teach Studio
Lesson 3 of 4
What you'll do in this lesson: - Open Auto-Teach Studio to craft customized courses - Outline stages, learning goals, and key concepts - Add interactive checks, diagrams, and cards - Publish your finished course to your teaching library
Open Auto-Teach Studio
From your tutor dashboard, click Studio in the top navigation. Studio provides a visual workspace designed for building AI-assisted interactive curriculum.
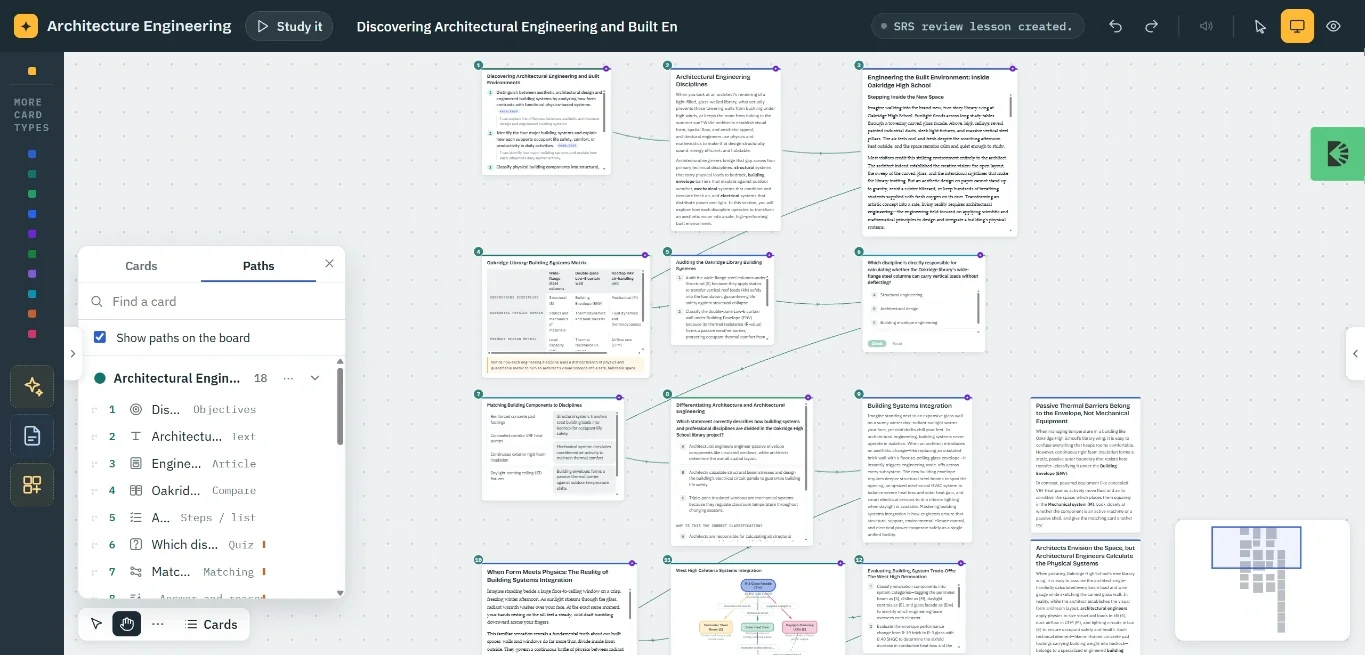
Click Create Course to start a new curriculum project.
Outline your curriculum
Enter your topic, target age, and primary learning goals:
- Studio organizes your lesson into logical progressive stages.
- Each stage balances clear conceptual explanation with quick check questions.
- Rearrange stages using drag-and-drop on the stage outline.
Customize stages and interactive checks
Select any stage card on the canvas to customize its content:
- Fine-tune explanations to match your specific tutoring methodology.
- Add multiple-choice checks, fill-in prompts, or step-by-step worked examples.
- Attach visual diagrams or illustrations to clarify tricky points.
Publish to your teaching library
When you are satisfied with the material, click Publish:
- Studio validates your stages to ensure all checks have correct answers.
- Once published, the course is available immediately in your library to assign to classes or launch live.
Tip. You can test your lesson at any time by clicking Preview in the top bar to experience it exactly as a student would.
Still need help?
Message the team, or open a ticket if something is broken. We reply by email.