


Setting up your classes and roster
Lesson 1 of 4
What you'll do in this lesson: - Create classes for individual students or group cohorts - Configure subject tags and grade levels - Use the interactive Roster Grid to manage enrollments - Organize student learning groups efficiently
Create your first class
Log in to your private tutor account and navigate to My Classes in the tutor navigation bar.
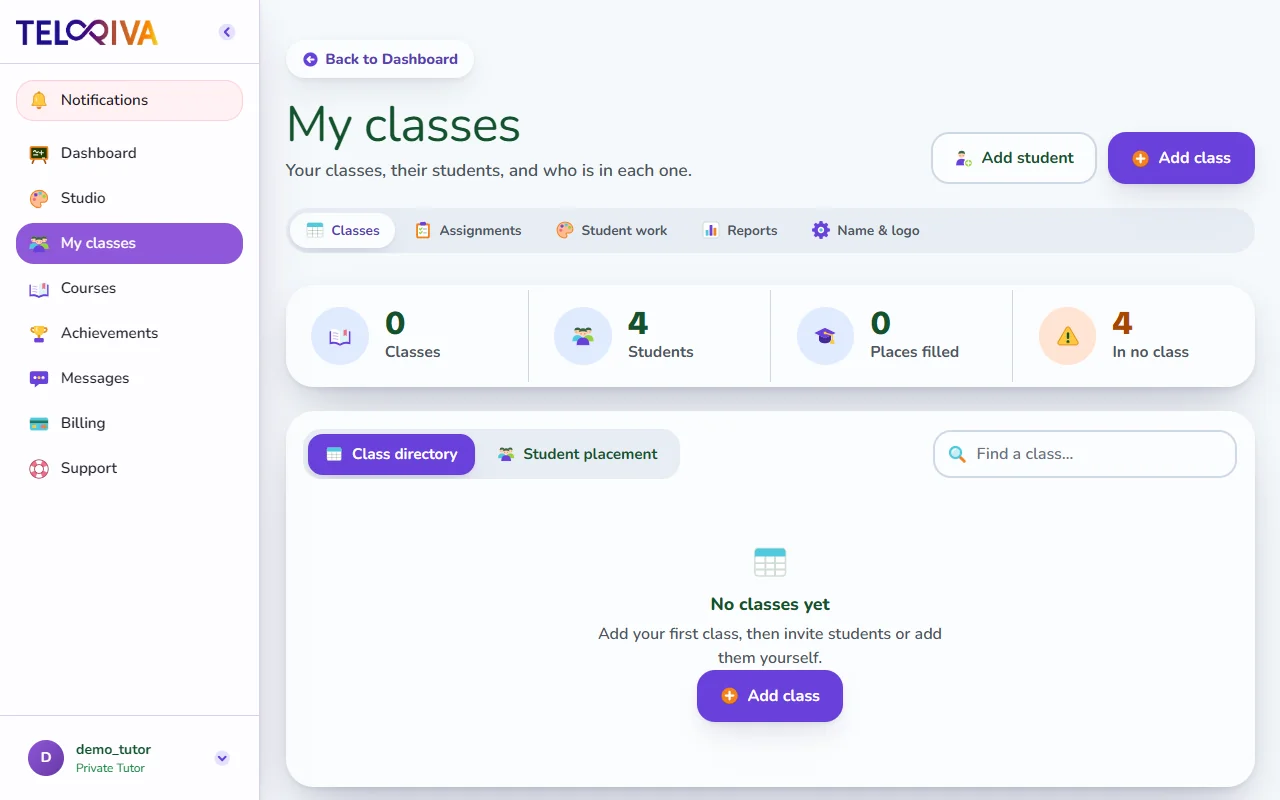
Click Create Class to launch the class configuration modal.
Configure class details
Fill in the core class information:
- Class Name: Give your class a recognizable name (e.g., Grade 10 Algebra or Thursday Evening Biology).
- Subject: Choose the primary subject area to ensure appropriate iconography and curriculum filtering.
- Grade Level: Select the target academic level.
Click Save Class to add it to your class directory.
Manage enrollments in the Roster Grid
Open the Roster Grid to view an interactive matrix of all your students along one axis and your classes along the other:
- Click any grid cell to enroll or remove a student from a class instantly.
- Changes save in real time without reloading the page.
- Visual checkmarks confirm active enrollment status at a glance.
Tip. You can organize classes for 1-on-1 tutoring, small revision groups, or larger classroom cohorts using the same roster interface.
Still need help?
Message the team, or open a ticket if something is broken. We reply by email.